Chard

When we move out of our London flat and into a place with an actual garden one of the first things I want to grow is Chard, particularly the varieties with colourful, rainbow stems. It is so useful in summer and autumn when it is at its best and replaces the heavy wintergreens in our kitchen. It is one of the first things that gets used up each week from the market because I can add it to almost every meal.

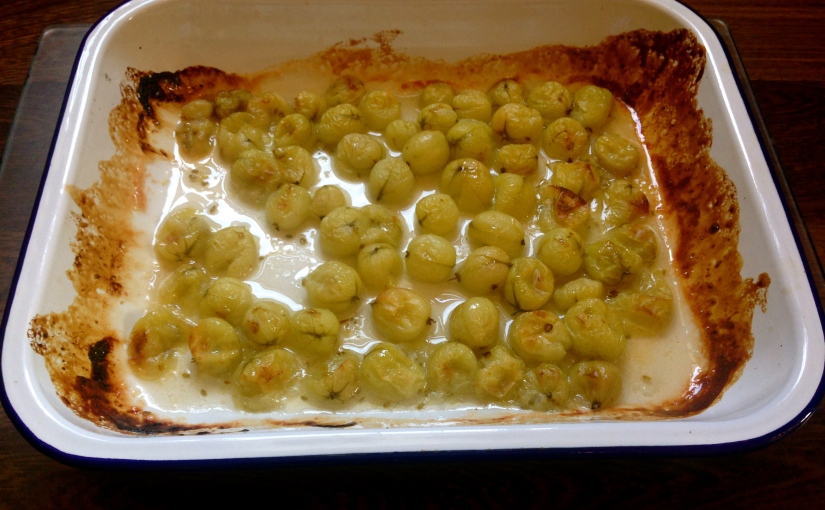
This week at the market I spent almost all of the £25 I allow myself to take with me each week, although the fruit and veg came to less than £20 having splashed out on a smoked duck breast (which was delicious). I managed to find some of the red gooseberries (which can be eaten raw) I mentioned a few weeks ago which were delicious on there own on the walk home as well as in the gooseberry cake Joel made.

IMG_2552

Back to the Chard, some places I have read suggest treating the stalks and leaves as separate vegetables, which I find strange. Yes the stalks need a little longer to cook but just add then to the pan/pot/steamer a couple of minutes before the leaves – let them stay together!

I think of chard somewhere in between spinach and kale in how I use it, the leaves keep their form better than spinach but are not as sturdy as kale. My favourite way to cook chard is to wilt it in a pan with a smidge of butter; in the same way you would spinach. Just add the stalks first and allow to soften for a few minutes before adding the leaves.

Chard also has a real affinity to bacon, particularly smoky bacon. For someone like me who eats very little meat it is unusual to say, but almost all of my suggestions for chard would be improved with the addition of some smoky bacon.

IMG_2572

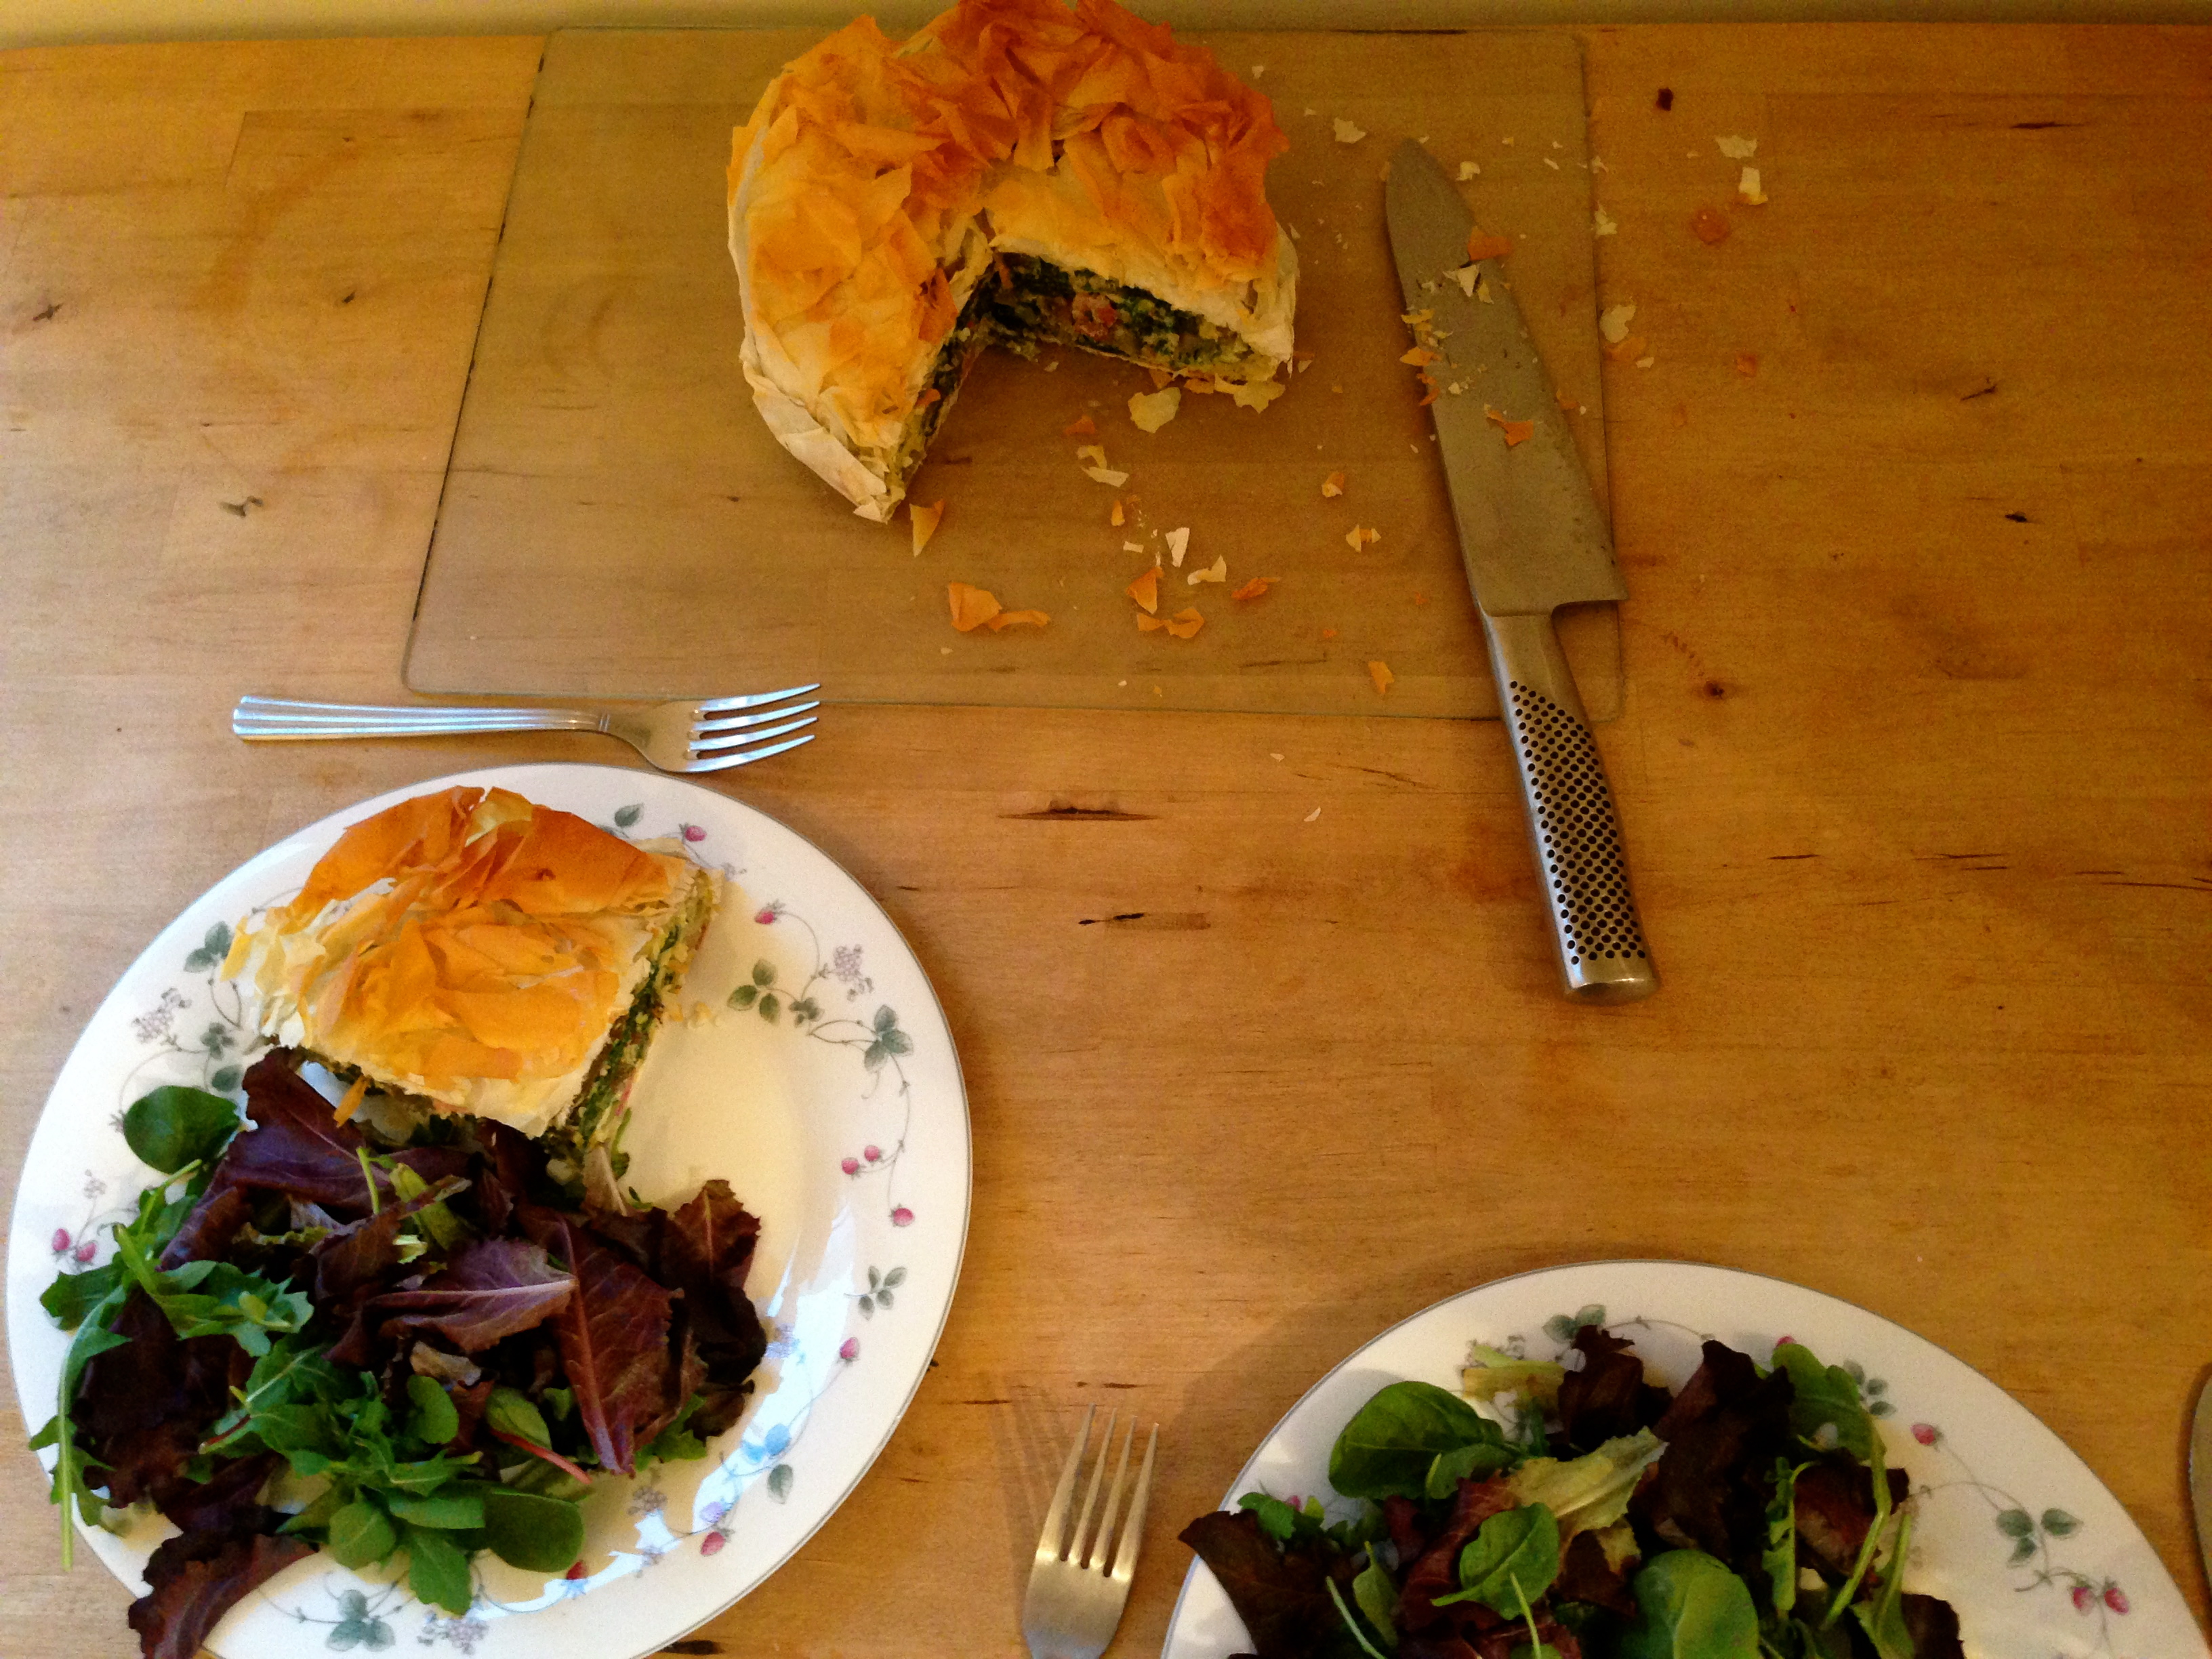
Chard, Feta and Bacon Filo Pie – Serves 4

Makes an excellent tea for two with enough left overs for a workday lunch.

  • 1 pack of filo pastry (because no one has that much patience with a rolling pin)
  • Small bunch of Chard – around 10-15 stalks
  • 3 rashes of streaky smoky bacon – diced
  • 1 small courgette – thinly sliced
  • 6 free range eggs
  • 2 tbsp chopped oregano
  • 150g of feta – cubed

IMG_2585 IMG_2586 IMG_2588 IMG_2594

Preheat your oven to 180 degrees.

Separate your chard leaves from their stalks, chop the stalks into 1cm pieces and roughly shop the leaves.

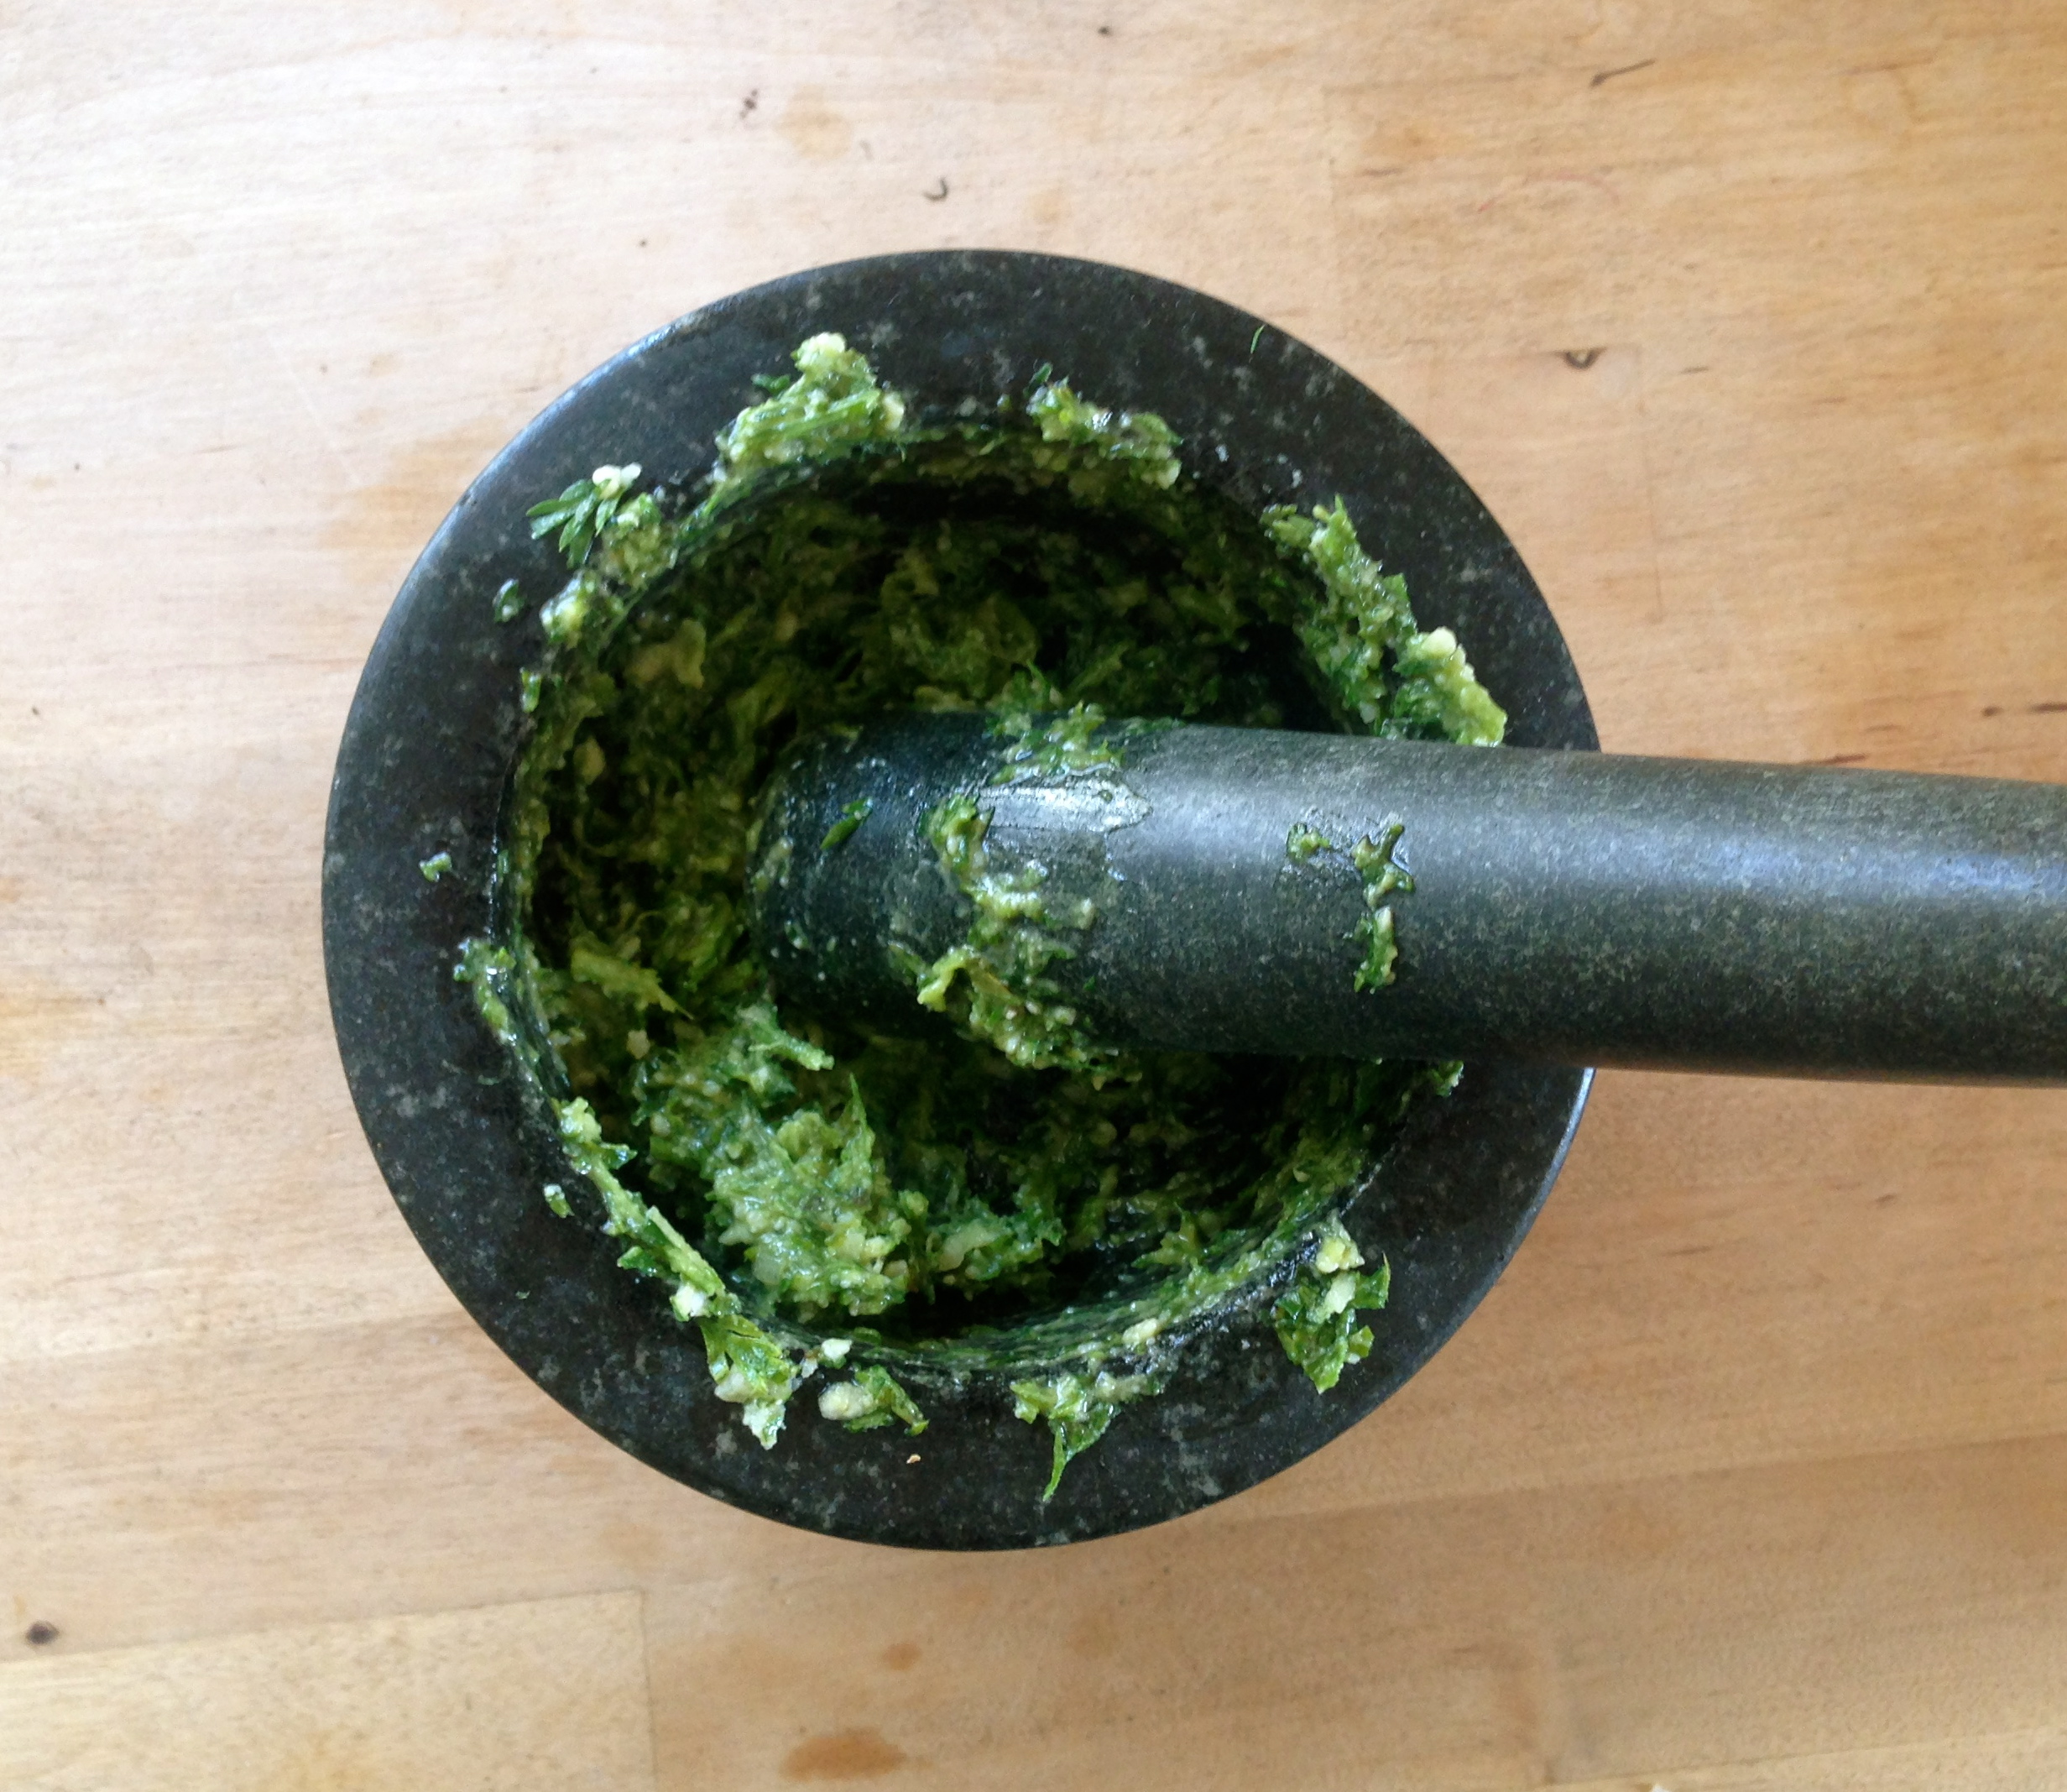
Heat a large frying pan and add your bacon and cook until turning slightly golden, add your chard stalks, allow to cook for 2 minutes before adding the leaves and courgette to the pan. Allow everything to cook until the leaves have wilted, 3-4 mins. Then remove from the heat and allow to cool.

Whilst the vegetables are cooling, line a tin with baking paper and then line with filo pastry, one sheet at a time with the sheets over hanging the tin by around 2inchs until you have a leak proof pie case (I use around 8 sheets).

Whisk the eggs in a large bowl and add the cooled vegetable mixture, feta as well as the oregano and a pinch of salt and pepper. Pour the mixture into your filo lining.

Fold the over hanging filo on top of the mixture adding extra strips of filo to the top until the mixture is completely covered and the pie has a somewhat scruffy crown of pastry.

Bake the pie in the oven for 40-50 minutes, until the top is golden and the mixture set firm

Other Suggestions for Chard

  • Try pan frying with gnocchi and the addition of smoky bacon – a great mid week tea.
  • Simply steamed with a little lemon juice (or Sumac if you have it), salt and pepper as a side. Adding in fresh peas as well makes this even better.
  • Added to stir fries.
  • Added to salads once lightly steamed and cooled.
  • Pan fried on top of a really good piece of toast with a poached egg hat.
  • Pan fired with softened onions, garlic and cannellini beans makes an excellent and healthy beans on toast.

Loubejac

For the past week we have been on holiday visiting my Auntie Sandie and Uncle Gordon in France. I have been visiting them in their amazing house in the Lot Valley for over 10 years and since my first visit one of my favourite things to do has been to visit the farmers market which is on every Thursday evening in July and August. It takes place in a small village called Loubejac in the field of the church. Local producers set up stalls around the edge of the field selling their produce, fresh fruit, wine, cheese, bread, meat cooked in front of you, salads, soups and many more.

IMG_2542

There is so much food on offer it can be difficult to decide what to go for. However there are certain stalls which I can never resist, bread from the local bakery, goats cheese served with floral honey and walnuts and as many fresh berries as is decent to consume.

IMG_2527

IMG_2520

The food on offer is amazing but what I really like abut the field is the communal feel of it, people from all backgrounds and nationalities (French, British, Dutch and Australian particularly) come together and eat, drink and generally be merry under the tree-lined field overlooking a beautiful valley.

I found it reassuring that the stall holders thought it a little strange that I wanted to take photographs of them with their produce as it shows that whilst there are many visitors at the market it is still about the food and hasn’t become a tourist attraction unlike most London food events and markets (anyone who has been to Borough market will know exactly what I mean).

IMG_2521 IMG_2534

As we sat around enjoying the food and wine a thunderstorm was skirting the valley providing some amazing skies that was inevitably followed by a downpour (to the delight of everyone after the 40 degree heat) this cut our evening a little short. Probably for the best after canoeing all day on the Dordogne I was pretty shattered and had already eaten a greedy amount of food and a little too much wine.

Carrot Tops

It was a speedy trip to the market this week as the dark clouds were coming in over London; we just made it home before the downpour. As we are out quite a lot of evenings this week it was a smaller shop than normal and came to just a tad under £18. IMG_2424As well as lots of fruit and veg (yes gooseberries again, Joel has assured me he will be making his mum’s gooseberry cake recipe) we also bought some amazing award winning cheese from local Wildes Cheese.

I really hate wasting food, any left over fruit and veg we have gets frozen to cook with later or added to smoothies or juices. I like to try and use all parts of the fruits and vegetables, beetroot leaves, broccoli stalks, citrus peel. So when I was at the market and saw a lovely bunch of rainbow carrots with their lovely feathery tops I knew I wouldn’t want to throw them away.

After a little thought, and some Internet research I decided to give carrot top pesto a go. It isn’t a true pesto in that I didn’t use any nuts as I wanted the delicate fresh taste to really shine through, but feel free to throw a few in.

We used our pesto simply, on pasta, on steamed new potatoes, and mixed with a little oil and cider vinegar as a salad dressing. I’m sure it would be great drizzled on roast vegetables or on pizza too.

I don’t have a food processor (our tiny kitchen doesn’t have much space for gadgets that take up so much space) so I made this the hard way with a pestle and mortar, but please feel free to pulse with a food processor instead.


IMG_2457 IMG_2461 IMG_2463

Carrot Top Pesto

  •  A large bunch of carrot tops – roughly chopped
  • 4 tbsp of olive oil.
  • 2 tbsp of fresh lemon juice
  • 1 garlic clove.
  • 75g (ish) of parmesan cheese.

If using a pestle and mortar add half of each ingredient to the mortar and bash like crazy until a slightly chunky paste is formed or your arms give out (mine did before my pesto reached perfect smoothness), repeat with the second half of the ingredients (sorry!).

If using a food processor add all ingredients to the processor blend until your preferred pesto smoothness.

The pesto will keep for a few days in the fridge but the fresher the better.

I am afraid I do not have any other suggestions really for carrot tops, but I would love some other ideas if anyone has any.

The Gooseberry

The classic British gooseberry, green, hairy and the butt of jokes, not to mention eating them raw gives you a tummy ache. Not the most promising of introductions for a fruit but show them a little love and they will reward you for it.

Gooseberries are from the same family as currents, to someone who has also had a tummy ache from eating too many red IMG_2365currents this doesn’t come as a surprise. The most commonly seen variety of gooseberry are the green hairy ones pictured below, these should really be cooked or their acidic insides will not do any favours to your insides. There are varieties of red and yellow gooseberry which can be eaten raw, but we wont be dealing with anything so fancy here today.

I struggle with anything that is overly sweet so I like the tartness gooseberries bring to dishes rather like rhubarb. This tartness can lend itself to both sweet and savoury combinations and my head is brimming with half formed ideas of how to use them beyond the traditional crumble.

It has been a roasting hot week in London with temperatures reaching 36 degrees! So for now I thought we deserved something refreshing to cool us down.

Gooseberry and elderflower sorbet.

I used an ice-cream maker for my sorbet, it is a basic model costing only £25 and in my opinion worth the investment. If frozen treats don’t feature large in your life the break-up-with-a-fork method will work pretty well too.

My recipe makes an intensely flavoured, deeply fruity sorbet. If you fancied something lighter, make in the same way but double the amount of sugar syrup you make (1/2 cup more sugar and another cup of water).

  • Around 450g of Gooseberries
  • 2 tbsp of sugar
  • 2-3 tbsp of undiluted elderflower cordial.
  • ½ cup sugar
  • 1 cup of water

IMG_2372

IMG_2378

IMG_2384

Rinse your gooseberries and remove any particularly scruffy bits (you could top and tail them but this feels a little unnecessary).

Spread your gooseberries in an oven dish and sprinkle with 2tbsp of sugar and bake in a medium oven for 25 minutes

Add your gooseberries and the juices they have produced in the pan to a food processor and blend until really smooth.

Add the cordial, remaining sugar and the water to a small frying pan and gently heat just until the sugar dissolves.

Combine the gooseberry mixture with the sugar syrup.

If using an ice-cream maker: Chill the mixture thoroughly (over night if possible) then freeze according to your machines instructions.

If not using an ice-cream maker: Pour the mixture into a Tupperware dish (it needs to be no more than ¾ full) and every hour or so, or whenever you remember give the sorbet a really good stir with a fork to break up the ice crystals forming. The more often you break them up the smoother the final result will be.

The sorbet will keep for about a month in the freezer.

 Some alternate suggestions for gooseberries:

  • Gooseberry cake/crumble/pie
  • The classic gooseberry fool (Delia suggests making with Greek yoghurt rather than cream).
  • Gooseberry chutney – delicious with cheeses and fatty meats.
  • I have notions of some kind of gooseberry salsa to accompany oily fish but I am still working on this one.

The Broad Bean

People have been suggesting to me for some time that I write a food blog however up till now I have been rather cautious. Mainly I think because I read so many beautiful food blogs which I know I can never live up to but maybe I have something different to share. One area I know will not be up to the standards of my favourite food blogs is photography I am an untalented photographer and my equipment is my old i-phone so I hope you can forgive me for that. The name of the blog is up for discussion, thinking of a name is definitely the hardest part!

This weeks Haul
This weeks Haul

So why have I finally decided to give this a go? After visiting our amazing farmers market today at this exciting time of year and filling my bags with everything I could cram in for the handsome sum of £25 (I only take that much cash with me as I am afraid I would get overexcited and buy far more food than two people could possibly consume in a week). So below is what I bought, excluding the handmade feta and sundried olives that were recovering from the rather warm walk home in the fridge.

Today I would like to talk broad beans that British allotment staple which I feel don’t get the credit they deserve. Firstly under the dull green, often mucky exterior there is a lovely fluffy inside nestling some milky green beans, or as my favourite primary school song would say “broad beans sleeping in the blanketey bed”. Podding the beans from their beds does take time however I enjoy it listening to the radio, podding the beans one at a time, to an office working Londoner that’s a peaceful moment.

Tucked up in their blankety bed

There are so many ways to enjoy these beans however there are some basic tips on cooking which are important. Firstly only the freshest, youngest, smallest beans can be eaten raw after they mature they get a little bitter. In terms of cooking I like to steam, but boiling works well too (particularly if you like to eat the skins). On the note of skins, they are perfectly edible however it is a matter for personal preference, I tend to find that I like the skins on if the beans are small and younger, for more mature beans I like to slip off their little jackets.

A few suggestions for broad beans (other than mine below)

  • Simply smash them with mint and a little butter or oil as a side dish which works really well with lamb or salmon.
  • Ottolenghi’s beef meat balls with broad beans and lemon in his Jerusalem book is a favorite in our flat.
  • Throw a few broad beans into your stir fry for added protein and fibre.

 Broad Bean and Buckwheat Salad – serves two.

  • A BIG bag of broad beans.
  • 1 cup of cooked buckwheat.
  • 1 bunch of Radishes.
  • A small bunch of mint.
  • 150g of soft goats cheese (Mine was feta but other will work well too).
  • Drizzle of good quality oil (I used cold pressed rape seed oil but olive would also work).

How to cook buckwheat:IMG_2354

Lightly toast the buckwheat groats in a dry frying pan for a couple of minutes, stirring occasionally until golden.

Add the toasted groats, two cups of water and a pinch of salt to a saucepan and bring to the boil. Once boiling reduce the heat to a simmer and pop on a lid and leave for 10-15 minutes until the water has been absorbed, please keep an eye on the progress of the buckwheat as if it completely dries in forms a solid crust on the bottom of the pan which is hard work to remove!

The buckwheat should still have a bit of a bite, If you look for too long it can go mushy and unpleasant. Remove from the pan and allow to cool.

 For the salad:

Steam the podded broad beans for 3-4 minutes (or boil for 3), once cooked run the cold tap over them to prevent them cooking further. Remove skins if desired.

Slice the radishes in any shape you fancy, I tend to like think circular slices, chop your mint finely and crumble your goats cheese.

IMG_2355

Combine all the ingredients and drizzle with your oil.

This salad keeps and travels well so it makes and excellent work day lunch, I’m thinking it will perk me up from the Monday blues tomorrow.

IMG_2359

If you made it this far thank you! I hope you enjoyed it.