Blackberry

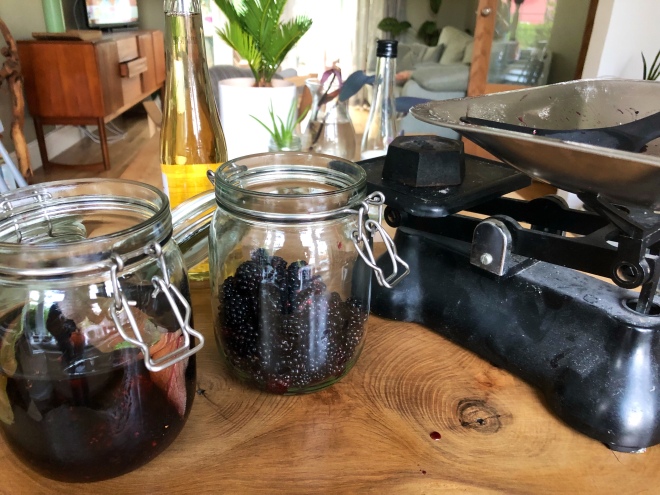
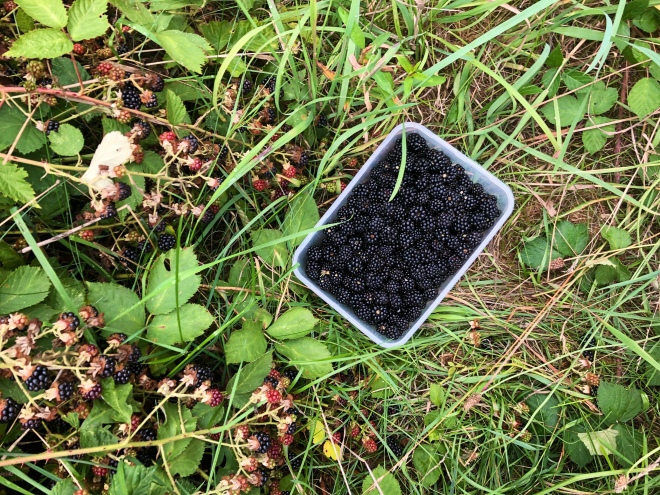
With the hot dry summer we were having until a few weeks ago I thought the blackberries would be small dry and bitter this year but it seems the rain came just in time. Beautiful big juicy berries are all over the woods behind our house. So out we went with tubs to fill, me in my yellow wellies Joel in shorts (shorts?!?!) and in half an hour had easily filled 2 large tubs. I could not recommend it more as a Sunday afternoon activity being out in the woods picking fruit really takes you back to being a kid again plus free fruit! I made a crumble of course (blackberry, apple and orange with an oatey topping) and some blackberry vinegar to try and keep the flavour of these delicious fruits for the months ahead and to liven up some winter salads.

Quick garden update: both the veg and the flowers are massively appreciating the rain, the greens are doing particularly well now and I have been handing out green bouquets of lakes, chards and aztec broccoli (watch this space). I have one very small butternut squash from my roadside seedling purchase so fingers crossed but in my heart of hearts I suspect it won’t ripen very well in a Manchester autumn but it’s been loads of fun to try.

Blackberry and Sage Vinegar

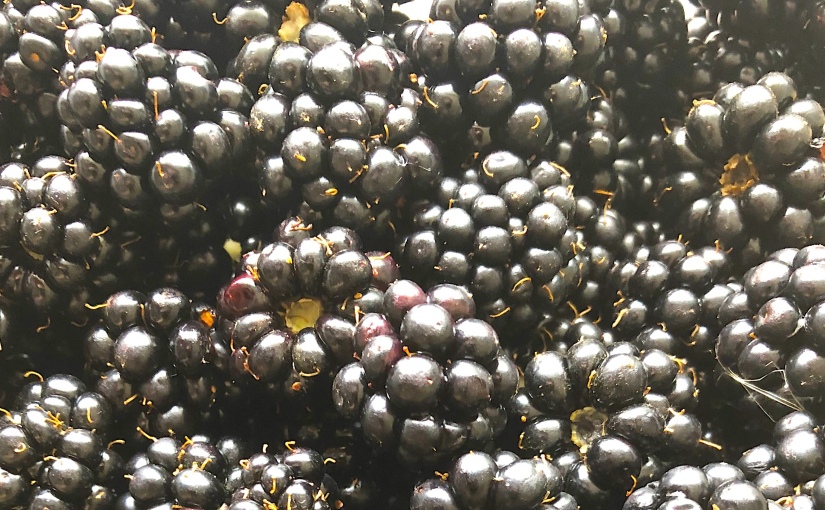
  • 700g blackberries – rinsed
  • 700ml apple cider vinegar
  • 350g granulated sugar
  • 6 Sage leaves

Optional equipment- paper coffee filters
In a Kilner type jar (who actually buyer kilner when Ikea do them so cheap?!?) add your blackberries, sage leaves and vinegar.

Leave for at least a week although 3 weeks would be better.

Strain the vinegar through a sieve into a pan and discard the blackberries.

Add the sugar to the pan and heat over a low heat until all the sugar has dissolved.

Once the sugar has dissolved bring to the boil and then simmer for 20 minutes stirring occasionally.

Leave to cool.

I then like to filter the vinegar as it creates a lovely clear liquid and will last longer as you have removed impurities. To do this arrange a coffee filter in a funnel over the bottle you will store the vinegar in and slowly add the vinegar to the filter ensuring it doesn’t go above the top of the paper.

Enjoy!

I would use this on salads – delicious with bitter leaves or peaches. You could also use it as the base of a sauce to go with venison or duck in the winter.

Ps Joel’s legs looked like he had had a run in with a gang of angry cats – morale of the story don’t wear shorts to pick blackberries!
Chives

There are finally signs of spring around, we had a few days of sunshine, the cherry blossom in next doors garden looks amazing and the bulbs have really come into their own.

The herbs I have in pots and planted last year have also woken up, particularly the chives. Last year I had a real issue with slugs eating them but I spread some egg shell around and have been more attentive in my slug hunts so touch wood I haven’t had any issues this year and they are looking great. Other than trying to keep the slugs at bay I have done absolutely nothing to look after them, they are so easy!

There have been some pretty major advances on the garden front, Dad and Joel took out the lower branches of the Oak tree allowing loads more light into the bottom of the garden. I now have two raised veg beds and we have been digging out two large flower borders from the grass including making a circular area of slate chippings in the middle of the border ready for a bench. We’ve started the planting in the borders but have some way to go – a few key things are thyme and alpine strawberries to provide ground cover, Philadelphus  for scent, a clematis to joining the climbing rose we inherited and plenty of others including a whole host of herbs around the seating area. Ill pop a few pictures at the bottom if anyone is interested.

Back to the food…Chives are such a lovely flavour, fresh and a little oniony but not overpowering. I think they get used too much as a garnish, chopped and scattered over any dish without much thought to their value as an ingredient. I tend to use them when I want that savoury onion-y flavour but with more subtlety than spring onion,  perfect in a creamy salad dressing or with white fish. I wanted to make something where they were one of the main flavours and I love a savoury scone in fact I would much rather have a savoury scone than a sweet with jam and clotted cream. I judge a coffee shop or cafe on the quality of their cheese scone – Joel does this with Victoria sandwiches (although he isn’t exactly fussy). Soup and a scone is hard to beat as a lunch combination in my book.

Chive and Feta Mini Scones

Makes 14 Mini Scones

  • 100g wholemeal plain flour
  • 75g of white plain flour
  • 1 tsp baking powder
  • 1/2 tsp bicarbonate of soda
  • 35g butter
  • 1 large egg
  • 2 tbsp milk
  • Salt and Papper
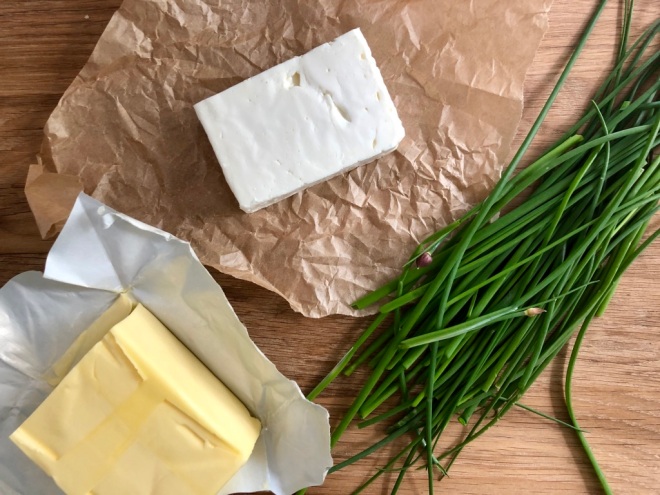
  • 150g feta – crumbles into chunks
  • 3 tbsp chopped chives


hlRxnkSaSpqU%cqpoaCLRQ_thumb_a6adUNADJUSTEDNONRAW_thumb_a6b0K8qQ3rLOSfK%1lvBSrV2kA_thumb_a6b1stale_thumb_a6b3

Pre heat the oven to 175 degrees. Combine the flours, baking powder and bicarbonate of soda in a mixing bowl. Rub the butter in to make a fine sand like texture. Add the feta and chopped chives, a pinch of salt and grind of black pepper.

Whisk the egg in a separate bowl and add to the flour (holding back a teaspoons worth), combine with a little milk until it just comes together as a dough – you dont want it too wet and you dont want to overwork it of the scones will be dense.

On a floured surface, roll (or just pat out) to a thickness of about 2 cm. Cut out using a small circular cutter and place on a lined baking sheet.  Brush the top of each scone with the remaining egg.

Bake in the middle of the oven for 12 mins.

There is no reason you couldn’t make these as big scones and cook for longer, I just like the little mini ones!

We ate ours with a spring green soup.

++bYnlOeSzKEjj8ThhXYog_thumb_a69eUNADJUSTEDNONRAW_thumb_a6a6VK5HgPRWSGWpm4yDpkpcsw_thumb_a6a4UNADJUSTEDNONRAW_thumb_a6a8

Jerusalem Artichokes

When the vegetable box came a couple of weeks ago and in with my cabbage, mushrooms, apples etc was a brown paper bag of knobolly strange little vegetables I’ll be honest I wasn’t sure what to do with them. I have eaten Jerusalem Artichokes before however it’s always been in the form of a mash or puree or soup – in other words mushy! Don’t get me wrong I like a break for my teeth once in a while and I love mash but I was keen to try something different. I used their earthy nutty flavour as a guide and combined with some smoky bacon and Rosemary as well as a fresh hit of lemon to make a nice simple side dish.

The Jerusalem Artichokes is earthy and nutty like a globe artichoke, but is not related to them, in fact it’s a type of sunflower which having googled what their flowers look like you can instantly see – I am definitely going to consider growing them as apparently they are super easy to grow – let me know if anyone has any experience of growing them?

The garden is progressing slowly, weighing it up against working on the house (the house won this bank holiday – the plus side being the whole of downstairs has now been decorated!) but we had some sunshine last Sunday so we dug two vegetable patches out of the lawn and I traipsed up and down the side of the house with barrow loads of compost, we now have what very much looks like two lined up graves in the garden. Hopefully when we use some wood to make them into raised beds they will look less grave-y – fingers crossed. We also laid out lots of string for beds and paths so we have a pretty good idea of what it will all look like. Dad is coming up next weekend and bringing his fancy new chainsaw to help us cut down a couple of the oak tree branches to raise the canopy and let a bit more light into the bottom of the garden and I’ll get to grill mum on ideas for planting. Holding out for a few sunnier, or at least not rainy days so we can get to work on it.

Anyway enough garden rambling back to the vegetables..

 Earthy Jerusalem Artichokes

Serves four as a side dish

  • 8 medium Jerusalem Artichokes
  • 1 lemon – zested and juiced.
  • 5 Rashes of smoky streaky bacon
  • 1 tbsp butter
  • 1 tbsp of finely chopped Rosemary
  • Optional delicious extra – a few drops of truffle oil

%WhK0G7LRgeLk6uy5TmlHA_thumb_a599hDW%I1GdStmZhdfLVUnxDw_thumb_a5a1

The artichokes will go brown if peeled and left out so first of all fill a mixing bowl with cold water and add the juice of the lemon to the water – as you peel each artichoke pop them straight into the lemony water. Once they are all peeled chop into small wedges.

Drain the wedges from the lemon water and add to a shallow frying pan on a medium heat, add a mug full of water to the pan and cover with a lid or tin foil – this allows them to part steam part boil in the pan. Once you can hear the water simmering leave over a low to medium heat for fifteen minutes by which time the artichoke wedges should have softened but still retain their shape.

Whilst the artichokes are cooking fry or grill the bacon until it is nice and crispy, set aside to cool then slice into thin strips.

Remove the lid of the pan turn up to a medium heat and allow any remaining water to evaporate off then add the butter, rosemary, half of the lemon zest as well as a good pinch of salt and pepper. Sautee for around 5 minutes so all the flavours can combine and the artichokes can turn golden brown.

Serve with the remaining lemon zesty and for a real treat a few drops of truffle oil.

Forced Rhubarb

Rhubarb is one of my favourite fruits and as a very inpatient person trying to eat more locally and seasonally forced rhubarb is a real treat if a bit pricey. I bought and cooked this Rhubarb at a farm shop after a fab afternoon at the Yorkshire sculpture park a couple of weeks ago when spring seemed to be in the air. Since then we have had some freezing snowy snaps (and a sneaky holiday to Cuba for some sun) but with the clocks changing this weekend and my bulbs popping up I’m hoping spring will be coming back soon.

Forced Rhubarb is deliciously fresh, delicate and shocking pink so I didn’t want to mess with it too much; I wanted to cook it in a way that the colour and texture remain in tact to celebrate this fab ingredient for the short period we have it for. This recipe is similar to something we served at our wedding last year – we had a trio of deserts one of which was cardamom poached Rhubarb so I thought it would be fun to recreate it.

Cardamom and Rose Poached Rhubarb

  • 3 sticks of forced rhubarb
  • 50g of sugar
  • 15 cardamom pods
  • 1 tbsp rose water

VudopPbfR86ZYq8m%rNCaA_thumb_a592VXzAbIaYQ32koCXJRuSj7w_thumb_a594yhvrAJQdQ9+QYllKLXNPGg_thumb_a59cLMzXXK1uRe2EqOMAoGgR0g_thumb_a5a5

Pre-heat oven to 150 degrees.

Trim the Rhubarb into 2 inch lengths and arrange in an ovenproof dish.

Bash the cardamom pods so that the flavour can get out add to a pan with the sugar and 250ml of water and simmer over a low heat until the sugar melts then continue to simmer over a low heat for 10 mins so the flavour of the cardamom can infuse. Remove from the heat and add the rose water.

Pour the syrup over the Rhubarb and place in the oven for 15-20 mins until the Rhubarb is soft but still retaining its shape.

The Rhubarb and Syrup is delicious on its own, with Thick Greek yoghurt, ice cream or meringues.

Cabbage

We spent last Sunday planting a new hedge at the bottom of our garden (excellent excuse to use the gardening equipment I got for my birthday) but it was absolutely freezing, so cold that I had to de-ice the padlock on the shed door before I could get into it, so I needed something warm and comforting for lunch.

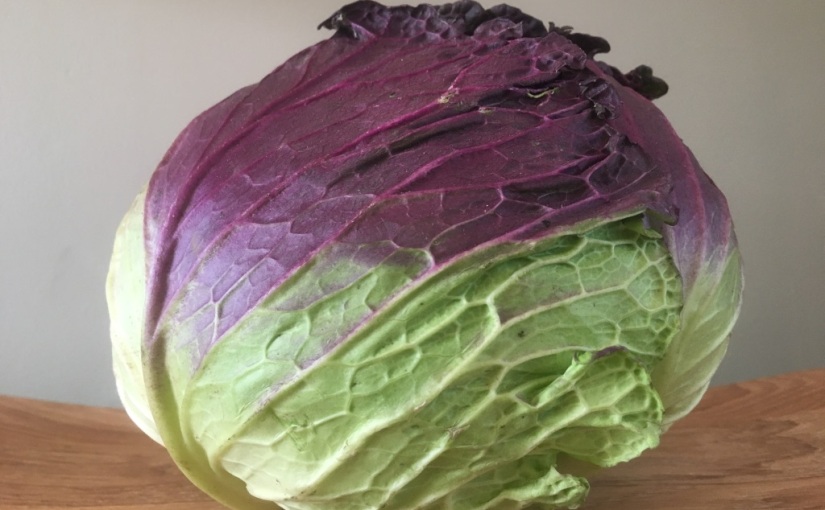
We don’t eat a lot of potatoes in fact I asked the veg box to stop sending them as they were sprouting in the bottom of the box every week. Most of our meals lend themselves better to rice, noodles or pasta. Plus the form of potato I like best is mash potato with tons and tons of butter so not the healthiest of options. However a fabulous looking purple tinged January King Cabbage came in the veg box this week so I decided to try and counteract the butter with loads of cabbage if I wanted to claim it as vaguely acceptable for lunch so mash soon turned into Colcannon.

Now I’m sure purists would object to my addition of the onion and fennel topping but I think it adds a little extra and plus it’s delicious to use on everything.

Colcannon with Fennel and Onion

  • Half a cabbage
  • 6 small potatoes
  • 1 large onion
  • 2 tsp fennel seeds
  • Copious amounts of butter
  • 2 tbsp of crème fresh

UNADJUSTEDNONRAW_thumb_a52cuxxnu9sYSkmW67yiA3j4Mw_thumb_a532xKHDo1%uRZOZwxBAPy6ZNw_thumb_a53aWIr%nRKFRQiPB2CjEFX0Rw_thumb_a53d

Peel and chop the potatoes into quarters and add to a pan with boiling water and simmer until soft – around 25 mins depending on variety and size.

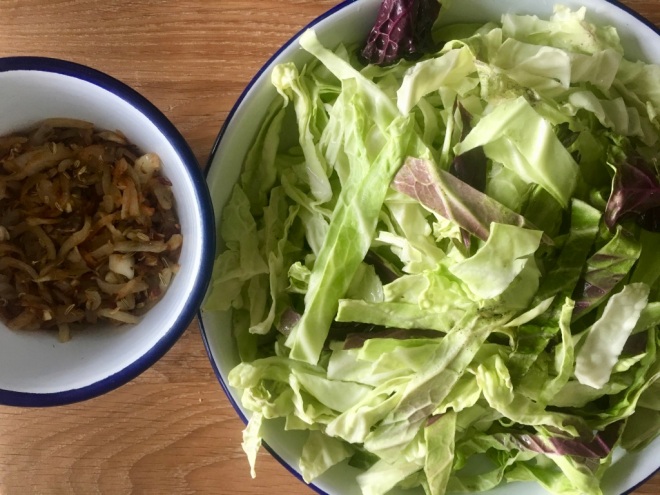
Meanwhile finely slice the onions and add to a frying pan on a low heat with a large knob of butter, after around 10 mins they should be soft and light brown, add the fennel seeds to the pan and cook for a further 5 mins over the low heat until sticky and soft. Remove from pan and leave to one side.

Wash the cabbage leaves, slice finely and add to the frying pan – the water on the leaves will help them soften and wilt – cook for a couple of mins until soft but not coloured.

Drain the potatoes, add back to the pan and mash with copious amounts of butter and the crème fresh along with a pinch of salt and pepper. Once lovely and smooth mix through the cabbage and serve with the onion and fennel on top.

If you’re feeling extra greedy and want to balance that goodness of cabbage you added to your mash – grate some cheese on top. If you’re feeling more patient and less greedy serve alongside sausages or roast chicken.

PS this is me being super excited about my new wheelbarrow! Note the accidental handle/Wellie combo

UNADJUSTEDNONRAW_thumb_a528


The Orange

Joel had an idea for this new year, instead of setting resolutions that are inevitably negative and about deprivation we are setting goals for the year instead, for me its to write more on here, to see more paintings out of my 1001 paintings to see before you die and definitely getting started on our garden, I’m sure over the next few weeks there will be more set but I like the idea of striving to achieve something rather than giving something up, which in the dark days of January feels twice as miserable as any other time of year.

I think January is a tough month for people, the depths of darkness with no Christmas to look forward to, the weather tends to get colder, and of course everyone is feeling a little tight on funds after the festive period. Therefore I think we could all do with something bright an fresh to cheer us up, this is a great salad for sharing and you could definitely justify it if unlike me you are trying to stick to those resolutions – plus the dressing uses up some of that cheese board port you still have knocking around (the booze doesn’t count in food, everyone knows that) so why not invite a few people over and brighten up January together.

Oranges always feel like a bit of a faff to me and would normally grab a clementine or tangerine over their full size cousin as the convenience of being able to peel on the go is so easy so I think when you go to the effort with peeling and carefully slicing an orange it feels a bit special. Particularly when they are in season and at their best from closer to the UK at this time of year.

Caramelised Orange and Fig Salad

Adapted from Ottolenghi’s in Plenty More

Serves 4 as a light salad.

  • 75g of caster sugar
  • 4 Medium Oranges – peeled and cut into 1cm slices
  • 8 Fresh Figs – quartered
  • 200g Feta
  • 1 bag Rocket
  • 1 Bag Baby Kale – or other sturdy salad leaf

Port and Lemon Dressing

  • 3 tbsp Lemon Juice
  • 3 tbsp Port
  • 1 tsp Fennel Seeds – toasted
  • 4 tbsp Rapeseed or Olive Oil

wmmKVa4oTJqbgAHd70R23w_thumb_a4c8dKaxbhAeReixGxQzbQo9qQ_thumb_a4cc7sk8lySoT7eKTGBtEaj0rA_thumb_a4cdMj5ATpUYRrasxJWcgm2aCg_thumb_a4d7

Warning: I am crap at making caramel – its gone wrong so many times in the past but the last few times I have done it right so here is the best way I’ve found to do it.

Using a (clean and very dry!) flat based frying pan pour the sugar in ad shake the pan to distribute evenly, put onto a medium heated hob. DO NOTHING, do not touch, do not shake, do not stir, just stand and hold your breath. The sugar should begin to melt and turn a lovely well caramel colour.

If not – if it clumps into a horrible mess unlike me don’t throw a paddy just add a cup of water to the pan and stir to the sugar all dissolves and makes the washing up a lot easier, clean and dry your pan and try again – hey at least sugar is pretty cheap.

Whilst your sugar is melting (or before if you are really anxious to watch it) spread your salad leaves over a serving platter, arrange half of the figs on top and crumble over half the feta.

Once you have your lovely golden caramel add half your orange slices whilst keeping on a medium heat, turn them over after about a minute, by which time they should have a lovely shiny caramel coating, allow another minute on the reverse side, set to one side then repeat with the rest of the oranges.

When all your oranges are caramelised remove the pan from the heat and add your dressing ingredients into the pan along with the caramel, give a quick stir to combine then pour into a jug.

Arrange your Caramelised Slices of orange over your salad platter, scatter your remaining figs and feta over the top.

Serve warm with the warm port and lemon dressing.

Note: If you would like to use this dressing on other things – which I highly recommend as it’s delicious then add a 1½ tbsp of honey to the above ingredients as you wont have the sugar from the caramel to balance!

I hope you have a wonderful new year and you achieve all those goals you set big or small.

Spinach

It feels like we have skipped autumn and jumped right into winter with all the storms we have been having, its not that its cold but it sure as heck is rainy. I love being back up North but I do miss those cold crisp winter days we used to get in London, Manchester is more mild and soggy, the leaves never quite dry up enough to crunch underfoot but its our city and I love it despite the rain.

We have a large Oak tree and a sycamore at the end of our garden which have been keeping us well stocked in soggy leaves so I have been making leafmold ready for the wonderful garden I will have built by this time next year when it is ready. By making leafmold, all I really mean is squashing up the leaves and packing them into black bin bags with a few air wholes in then piling them up at the bottom of the garden. Absolutely minimal effort for what Monty Don assures me will be the gardener’s equivalent of gold dust.

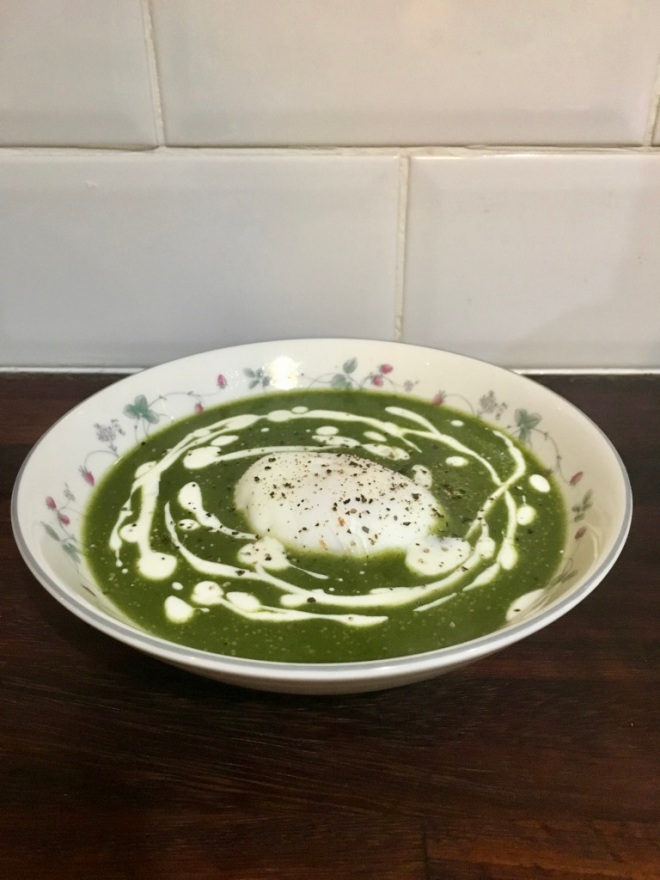
The wild weather does call for something soothing, warm and dare I say it healthy. So time for some green sludge soup. Spinach is a tricky one I add it to a lot of dishes but mainly ones where I can hide the cooked texture a bit, I love the flavour but I find the texture a little slimey so give me it pureed, give me it hidden into dishes or in a stew but never fried on the side – and only ever chopped up minutely in eggs. Soup therefore is the perfect vessel for this veg in my opinion.

Full of vitamins that boost energy levels it should give you a little boost in these rapidly shortening days.

Green Sludge Soup

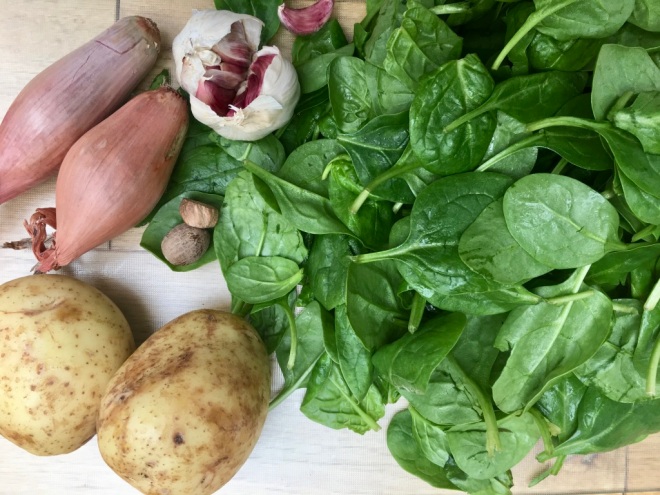
  • 400g of Spinach
  • 2 Potatoes
  • 2 Shallots
  • 4 cloves of Garlic
  • Olive Oil
  • 1 tbsp of Vegetable Bouillon Powder
  • Nutmeg
  • Salt and Pepper

To serve – and make more elegant, less sludgy

  • Crème Fresh
  • Poached Egg

WlSJVfkFQHqrQ032jgXffQ_thumb_a2aeiHT45HsLS4i0Vpc%skuttA_thumb_a2b4kQmLIO6US3C+NG9aClNRyA_thumb_a2b6bCPv1OVYT6+FYyfcrbFITQ_thumb_a2c0

Chop the shallots finely and add to a large saucepan with a splash of olive oil, ry until the onions are soft then add the chopped garlic.

Peel and finely dice the two potatoes and add to the pan. Along with the bouillon powder and a litre of boiling water.

Simmer until the potato is cooked through – about 15 mins then add the spinach to the pan – half at a time, it will look like there is no way it is going to al fit in the pan, but trust me it will reduce to almost nothing in the steamy soup. Once all the spinach is added cook for a further 5 mins.

Take off the heat and using a stick blender blend until smooth. Grate in half and nut of nutmeg and a good pinch of salt and pepper, stirring to combine.

To serve mix crème fresh with equal parts of water in order to make a runny cream, drizzle into the bowls of soup, top with a poached egg and another grating of nutmeg and black pepper. Toasted and buttered soldiers are great with it too.